When I made my first steps on the HF bands with my indoor loop antenna, I only had slim hopes to have an antenna mounted outdoors in the near future. Living in an apartment, I did not want to ask too much from my landlord – who is always very accommodating and in general exceptionally pleasant to deal with. Finally, I had a convenient moment and asked for a huge favor – and to my absolute surprise, heard a “yes, go for it!” right away!
Of course, I had some very reasonable limitations to deal with: I could not mount anything to the walls or on the roof, and I had to use an existing pole from a satellite dish that was removed several years ago. Nevertheless, I was a very happy ham at that point – I am getting a more efficient antenna! Since then, I spent more than a year occasionally working on the HF bands, and recently celebrated my 1000th contact on the air. A year after the installation of my outdoor antenna, I’d like to share some memories and thoughts.
Making a choice
I had only one requirement for my future antenna: it had to be multi-band (as I was eager to try something more than the 20 meter bands that I mostly worked on in the past months). I also wanted it to be resonant, so that I will not need an external tuner (my Icom 7300’s tuner only works with SWR less than 3:1). When it came to making a choice – it was obvious that any sort of dipoles, G5RV, or random wires were out of question for me. I thought about getting a TAK-tenna (which I liked a lot) – but decided that the installation site that I was offered is most suitable for a vertical antenna.
Now the question was – which vertical antenna to choose? There are multiple options, and many of them have dozens, if not hundreds, of good reports from happy users. Most of them can be divided into two groups: vertical that require a radial field, and those that don’t. Needless to say, I first looked towards the latter group – with Cushcraft multibander series (R8 and R9 being the latest models), GAP Titan DX, HyGain DX-77A and AV-640 (or its bigger brothers), Diamond CP6AR and Butternut HF9V being the most popular representatives.
Unfortunately, there are some reservations that need to be taken into account while installing and using such antennas. Most of them have quite long radials extending from the matching network at the bottom of the antenna. These are stainless steel rods (almost 50″ long on Cushcraft R9) – and unfortunately, they are potential hazard for animals and kids if the antenna is mounted in open space. Elevating it to 8-10 feet above ground was not an option for me either – as at the overall length of ~40 ft the system will require very solid guying system, which I have no space for.
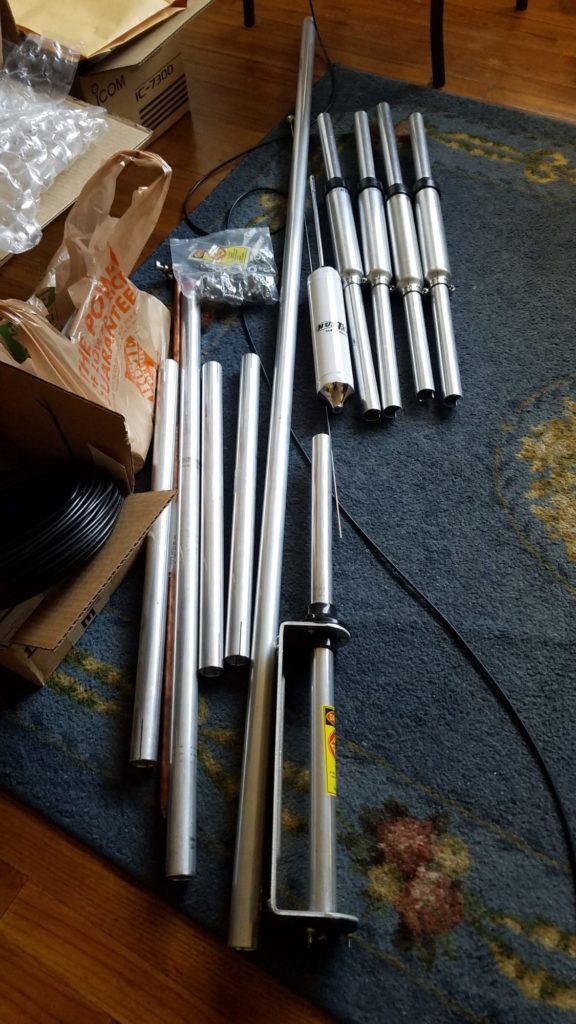
This, it was decided – I am getting a trapped vertical, and will have to think about the most efficient radial field that I can have. Like I always say – start with what you can have, something is better than nothing! At that point, I didn’t have to look much further – I already read a lot of great things about the Hustler multibander series (4BTV, 5BTV and 6BTV). These antennas are on the market for over half-century, and are real workhorses.Soon enough, I got the package with my all-new 6BTV – a 6-band trap vertical covering 10, 15, 20, 30, 40 and 80 meters.
Installation and tuning
Of course I couldn’t wait to get the new antenna on the air! The installation was scheduled for the coming weekend. In the meanwhile, I measured the run of the coax cable inside and outside of my apartment, drilled and weatherproofed the hole in the window frame to get the coax inside the apartment, and pre-routed the cable.
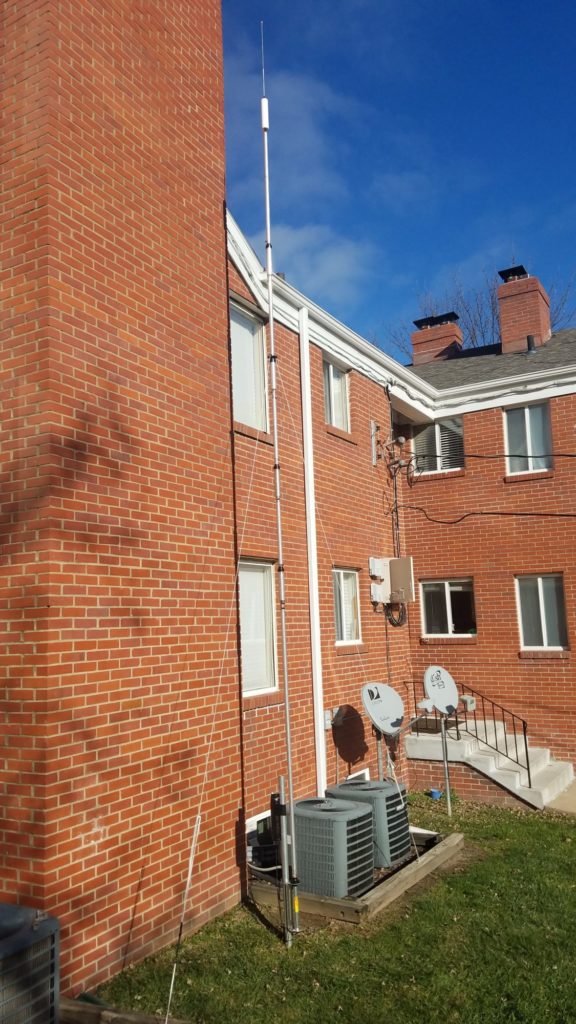
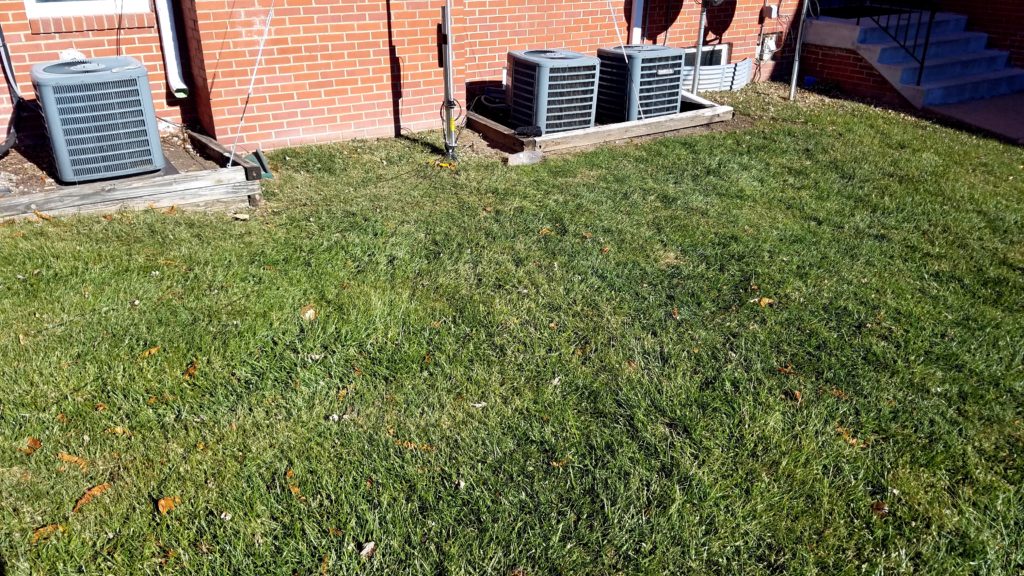
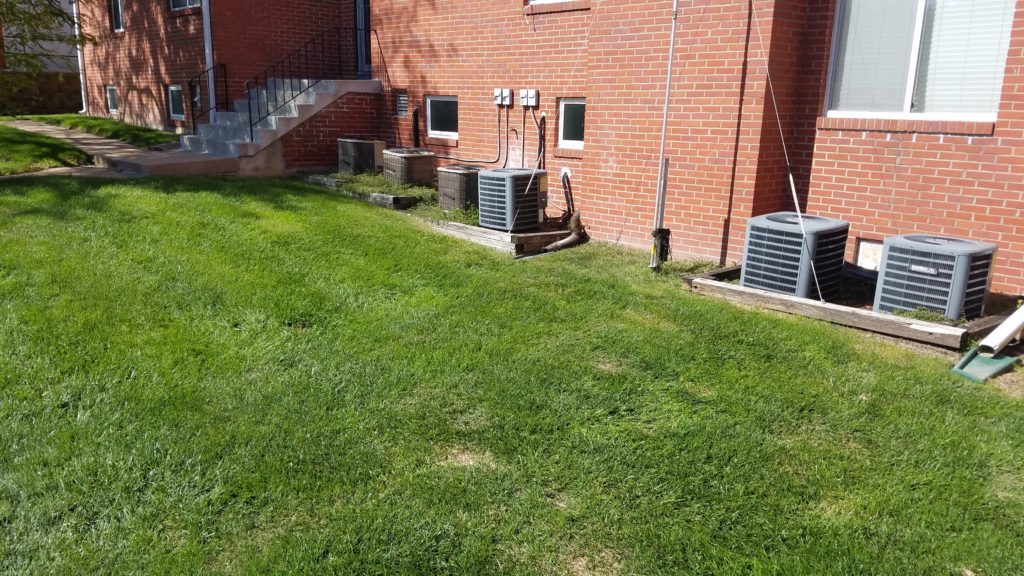
It felt like time stopped somewhere in the middle of the week – but the weekend finally came. I asked my friend, Bryan KØBNM, to help me – and we started on a Saturday morning in mid-October. We mounted the base to the post that was made available to me – one obvious drawback is that it brings the antenna too close to a brick wall of the building. However, I had no other options, so I gladly and thankfully pursued this one!
Next step was to assemble the antenna itself. Apart from a few hose clamps that snapped while I tried to tighten them – the assembly process is very straightforward, and the instructions are very clear. (Speaking of hose clamps – there are no spares provided, thus it was a smart move to buy a few in the hardware store ahead of time, and I suggest that you do the same!). Another important suggestion – use a good copper lubricant for all the joints – it will improve the contact on all connections, and will make disassembly much easier years after, if needed. I used the Jet-Lube SS-30. Make sure you don’t put too much though – otherwise the tubes will be too slick and you will have hard times fixing them in their positions with the hose clamps (they will just keep sliding down).
Before connecting the antenna to the coax, I made an RF choke to prevent the currents from getting into the shack. I took a foot-long piece of 2″ diameter PVC pipe, drilled two holes, and wound 25-30 turns of coax around the pipe. I then put several turns of wide electrical tape around the coax. Last, I connected the coax to the “hot” and “ground” terminals of the antenna per the installation instructions. The overall assembly took less than 3 hours.
A week later, my other friend and radio guru Nick KW1RKY helped me to tune the antenna using his spectrum analyzer. It was good to have some advanced equipment and expertise for this step, as we actually had to tune the traps (we achieved the limit by moving the tube elements, and still had the resonance off the target frequency on 40 meters). Tuning was probably the most laborious process, and took at least 3 hours as well.
Radial field
When I asked for permission to install the antenna, I wasn’t sure about its type – thus I didn’t mention that I may need to bury almost 400 feet of wire into the lawn. 🙂 After getting a huge favor and having the antenna installed, I was somewhat hesitant to ask for more right away. However, even that turned to not be a problem: I only had to reassure that I will take responsibility for any damage to mowing equipment, should this happen.
I started by mapping that part of the lawn where the antenna was installed. It borders three concrete walkways and a wall – thus, I had to stay within these limits. I decided to install 18 radials at 9° separation from each other. On my plan, I mapped the radials, and determined the length of each of them.
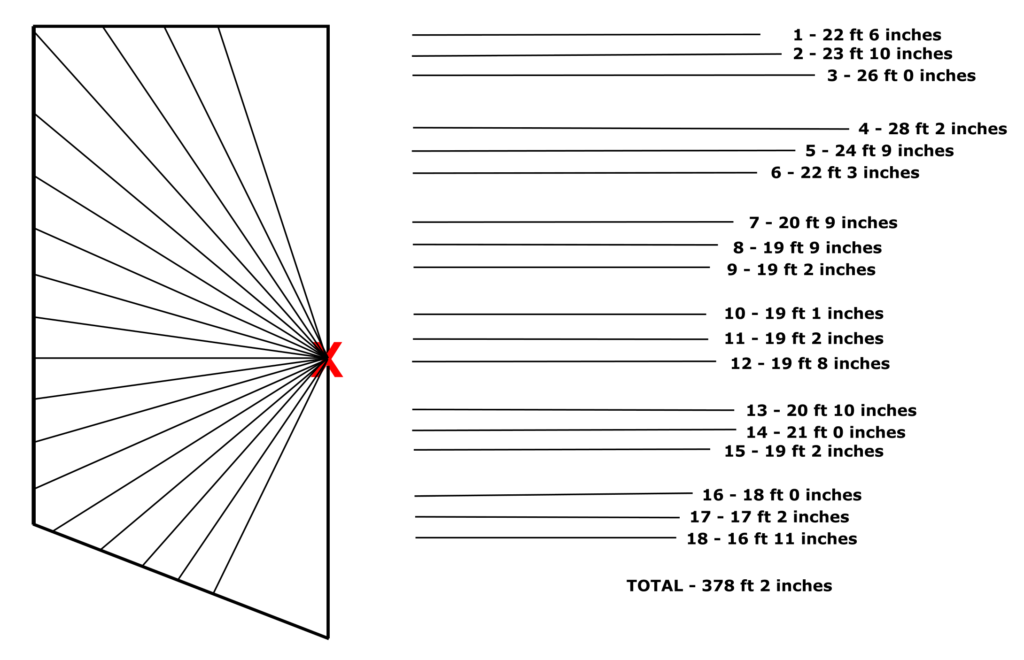
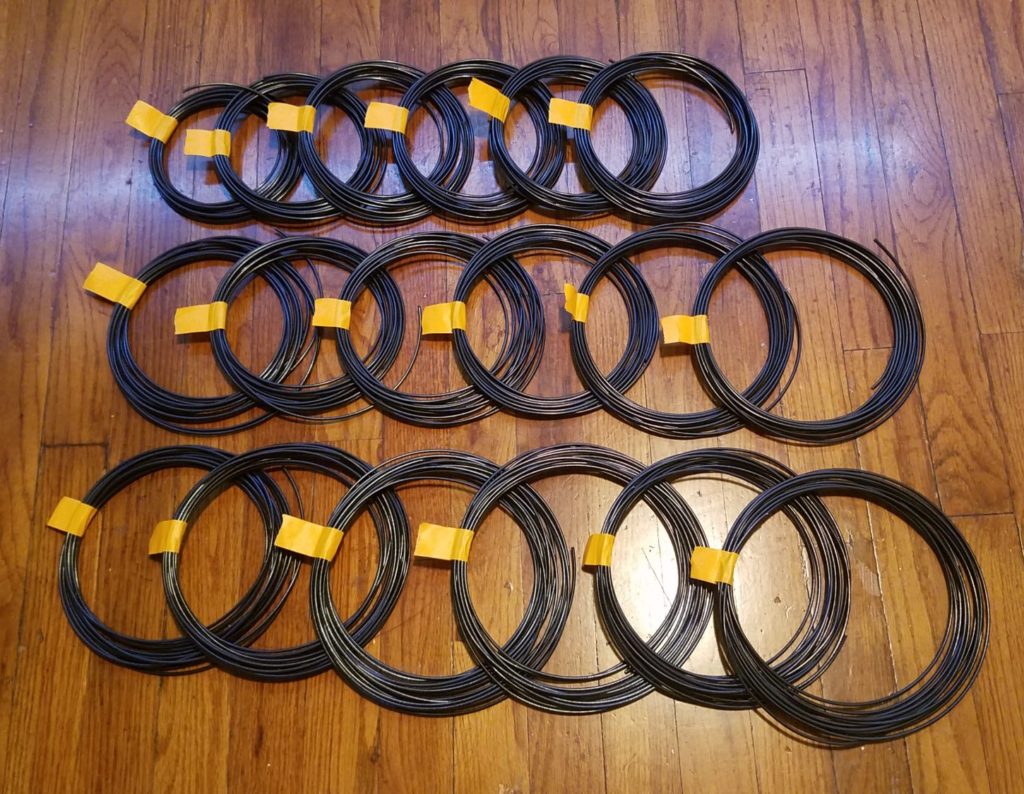
For the actual radials, I purchased a 500-ft spool of 14 awg stranded copper wire. I cut all 18 radials to their calculated lengths – and numbered them since they all are somewhat different. They were then grouped in triples, soldered and crimped into six ring terminals – to be attached to the bolts at the antenna base, 9 radials (3 terminals) on each side.
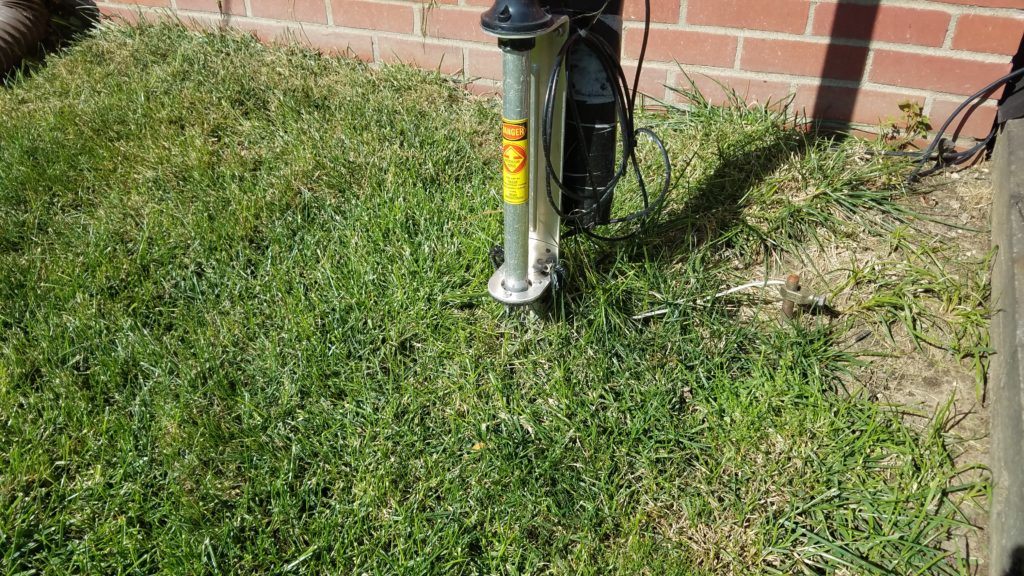
To help during the installation, I also purchased a bag of biodegradable radial wire anchor pins from DX Engineering. The actual installation consisted of getting the radials tucked into the grass one by one (my back didn’t like this part!), securing by the anchor pins at about every 3 feet. It was late enough in the season, and I wasn’t worried about the freshly-installed radials messing with the mower. It had to be seen, however, how well the magic of the newly grown grass will work in pulling the radials down into the soil. I read a lot about it – but wanted to see it myself!
I usually wait for spring to come anyway – but the spring 2019 was especially welcome! Not only because the preceding winter was exhaustively long – but also because I couldn’t wait for the grass to start growing and fully cover my radials. And it worked! Early in the season I could still see them closer to the antenna, where they were more obvious. However, already in summer I could barely find one, even if I look very carefully! Of course, they didn’t cause any issues with the mowing equipment.
While I understand that my radial field is not ideal – I took the most of the space that I have, and it still does its job. The fact that is only spans at almost 180° from the antenna – and not even close to the whole 360° – does not seem to cause any directionality, as some people suggest.
Performance
I couldn’t be more please with the antenna itself, and the installation that I have, given the location particularities. Even surrounded by concrete walls from three sides and only having radials on one side, the antenna performs reasonably well. I regularly make contacts all over the contiguous United States, reach Canada and Mexico most of the time, and sometimes get to the Caribbean stations. I even scored several SSB phone contacts to Canary Islands, Cape Verde and Madeira – all in the range of 6850-7250 miles away. My most distant contacts so far were with stations LT1F and LU3MCJ in Argentina (almost 9500 and 9100 miles away, respectively) and CV7S in Uruguay (9200 miles away).
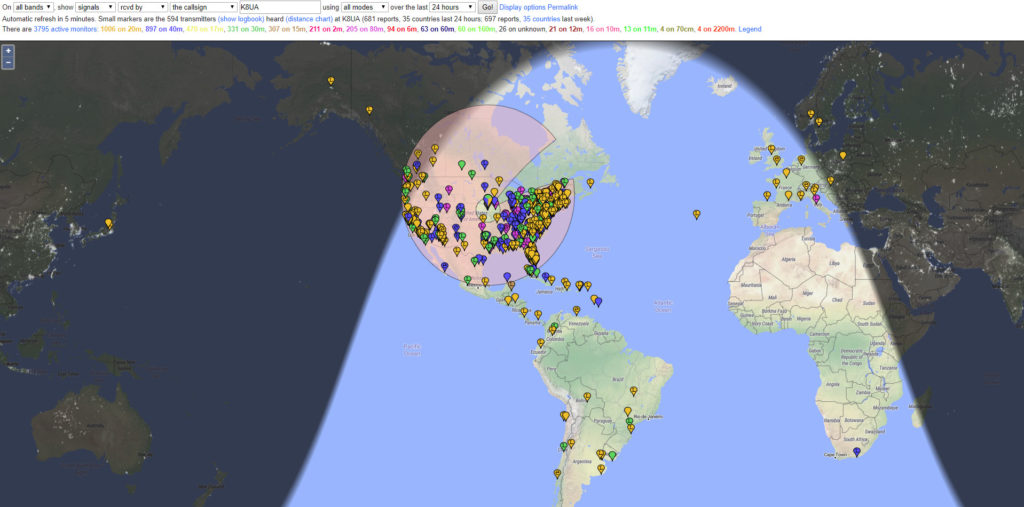
Shortly after installation, in late November 2018, I also ran a quick propagation test using FT8 and PSK Reporter. Based on the map, my signal was picked up in most of Western Europe, South America, and even in South Africa and Japan. I did have several voice and FT8 QSOs with Hawaii, but so far was never able to reach Alaska.
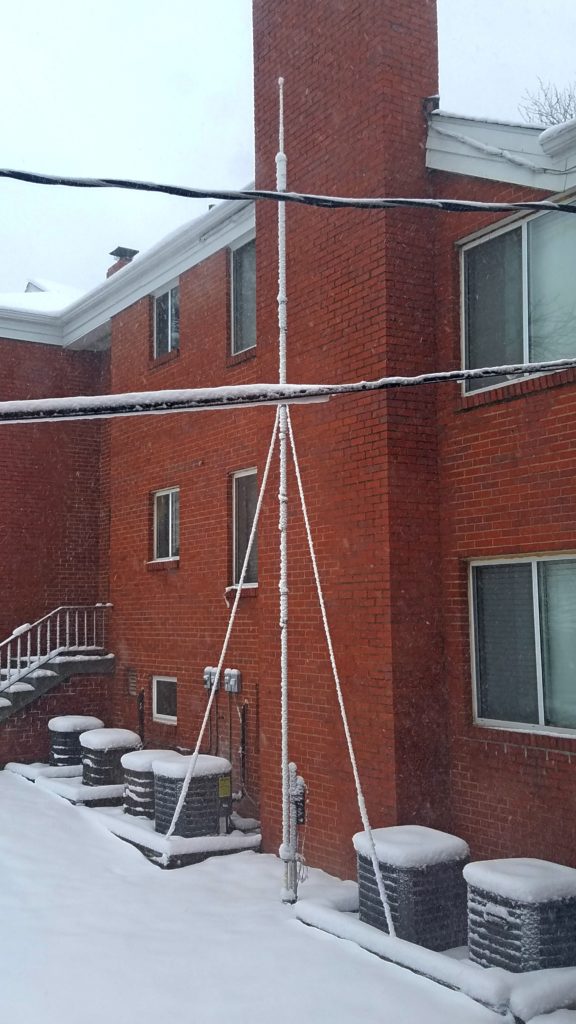
Another encouraging fact is that the antenna was able to survive every weather that a year in Midwest threw at it: thunderstorms, hail, downpours, snow storms and freezing rain. It withstood winds over 55 mph with higher gusts. Of course I wish I had a 60-foot tower with a beam on top – but I am very happy with what I have now, as it gets me on air whenever I want!